Client Setup
This guide walks through creating an x402 client that authenticates and pays for requests routed through the Consensus network. The same four-step pattern works across ICP, SVM, and EVM — only the signer setup and scheme registration differ.
By the end you will have a working client that automatically handles the x402 payment flow: your code makes a normal fetch call and the client handles the 402 → sign → retry cycle transparently.
Prerequisites
Section titled “Prerequisites”Signers
Section titled “Signers”To create an x402 client, first generate a network-compatible signer object, then ensure the associated account is funded.
Your ICP signing identity is generated from a PEM file. You can obtain this file from dfx, icp-cli, or by exporting from compatible wallets such as Plug Wallet. All three methods produce the same PEM artifact.
Using dfx or icp-cli
icp-cli is the command-line tool for ICP development and identity management. It serves as the replacement for dfx.
Export an existing dfx identity:
dfx identity export <identity-name> > identity.pemAlternatively, using icp-cli:
icp identity export <identity-name> > identity.pemUsing Plug Wallet
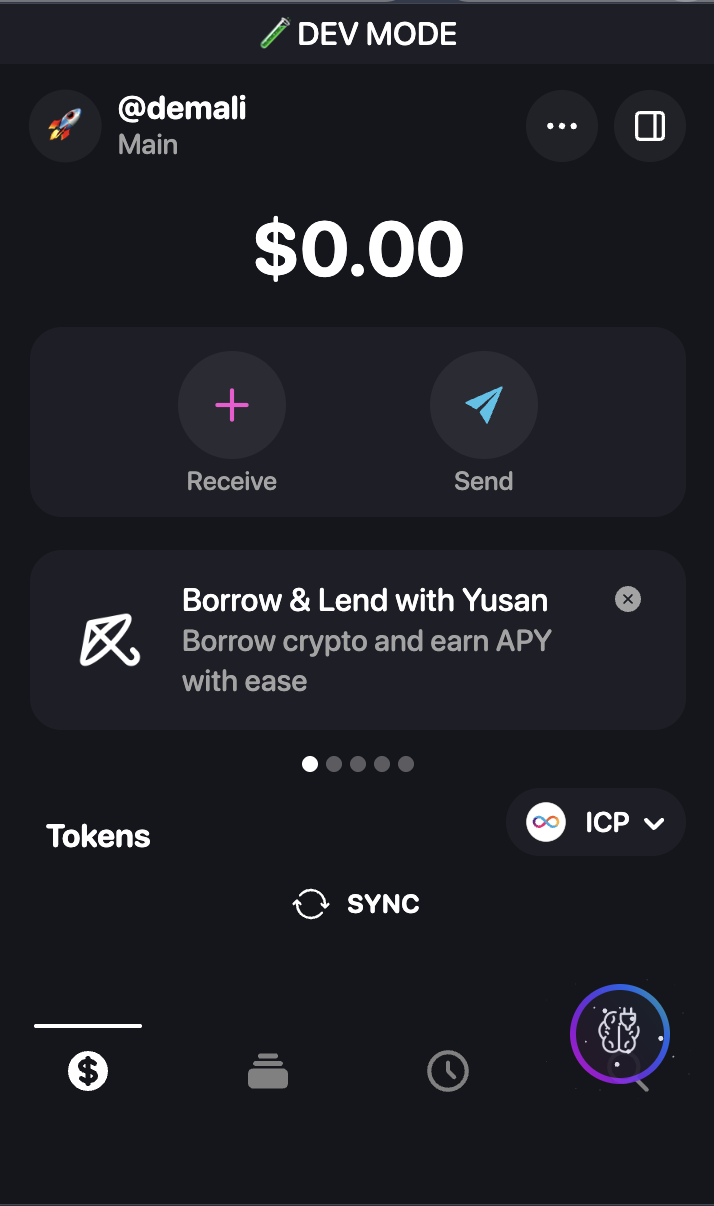
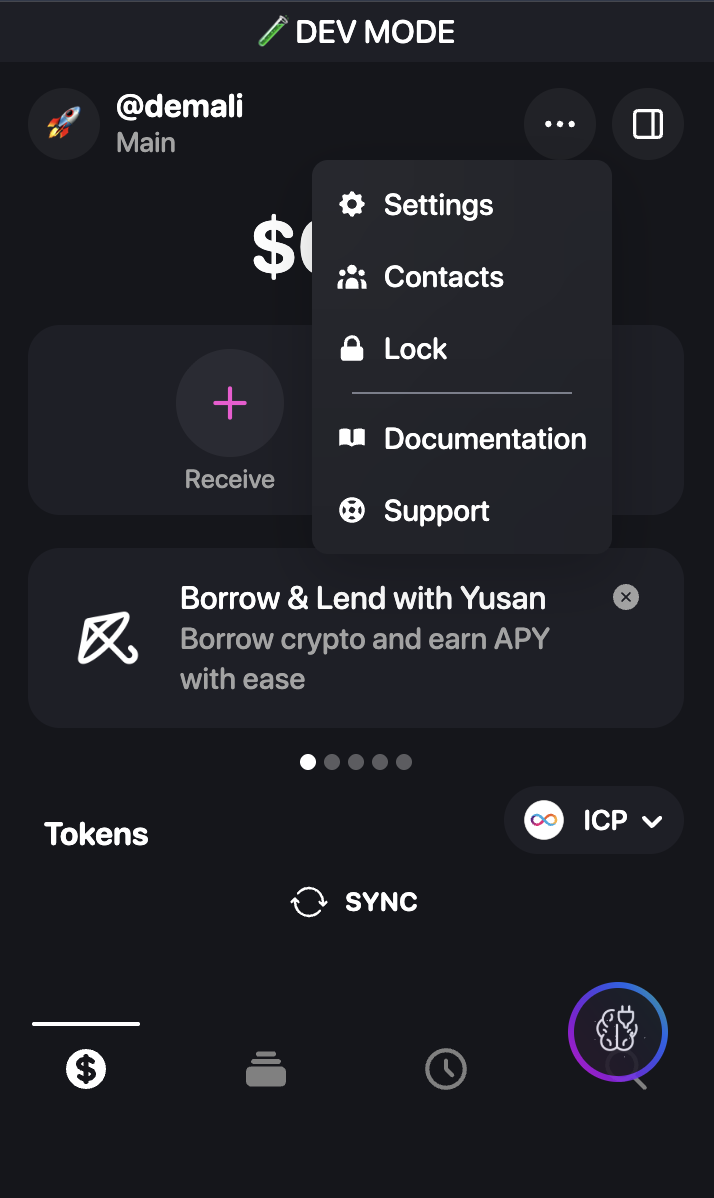
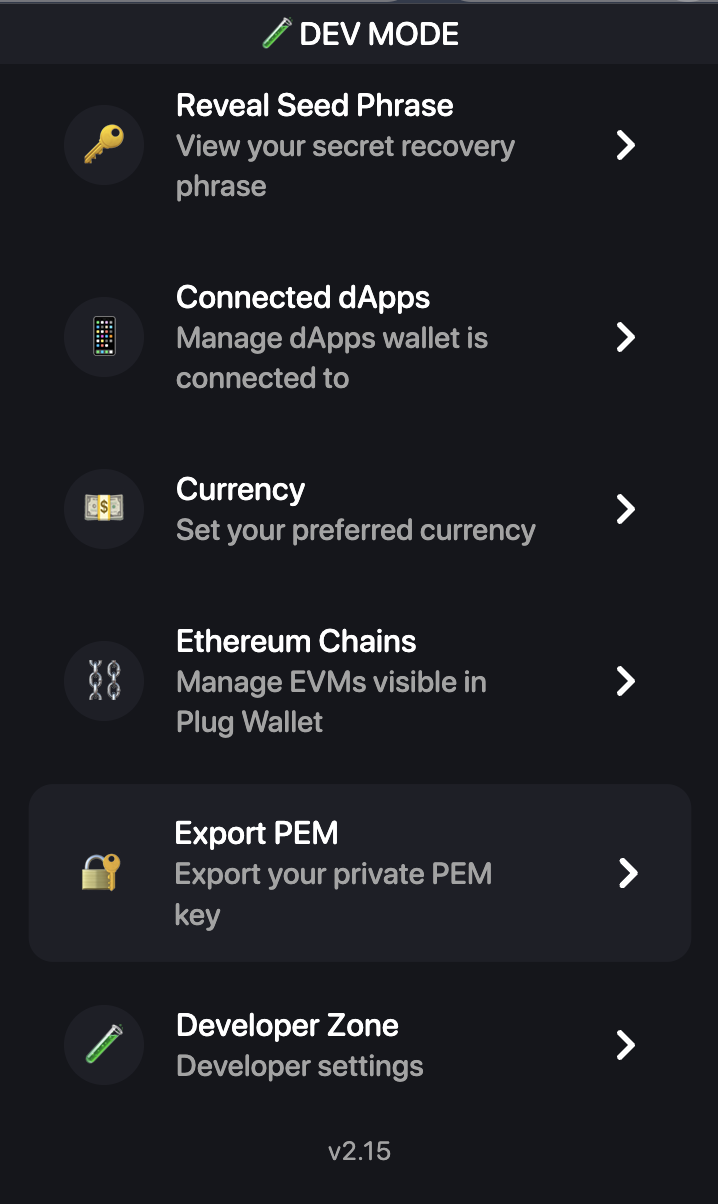
Plug Wallet stores your ICP identity in the browser extension. To use it in server-side applications, export the private key as a PEM file.
Export steps:
- Click the menu icon (···) in the top-right corner
- Select Settings from the dropdown menu
- Click Export PEM to download your private key
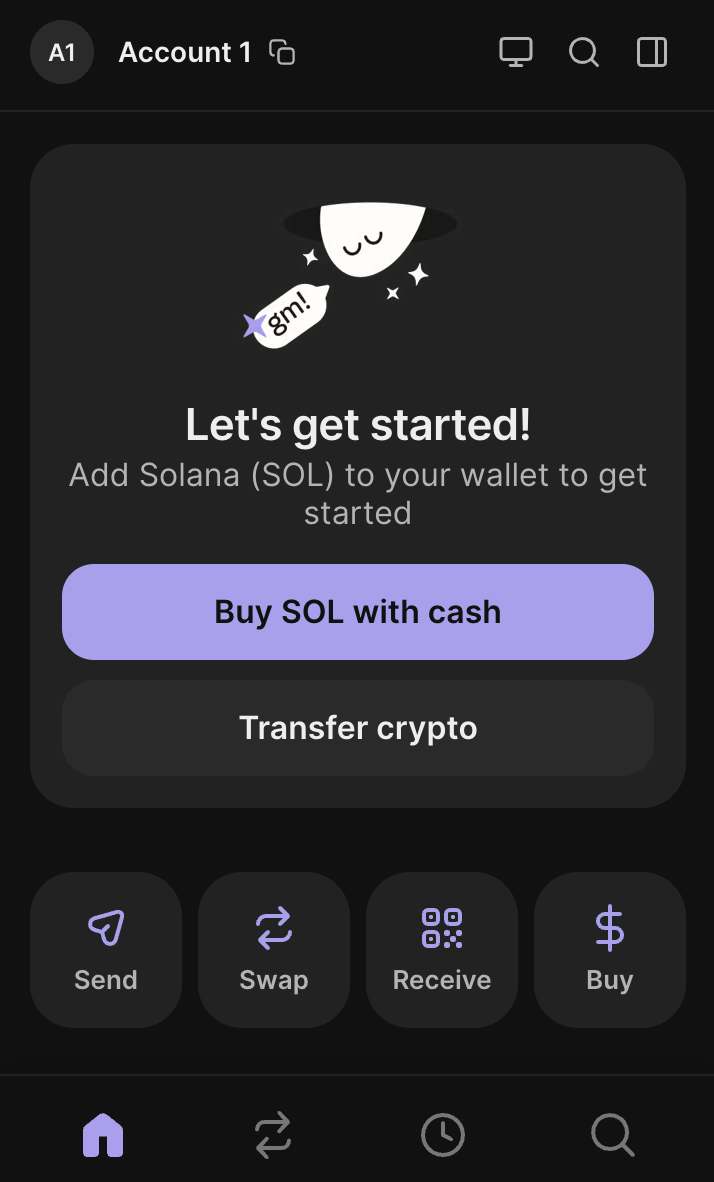
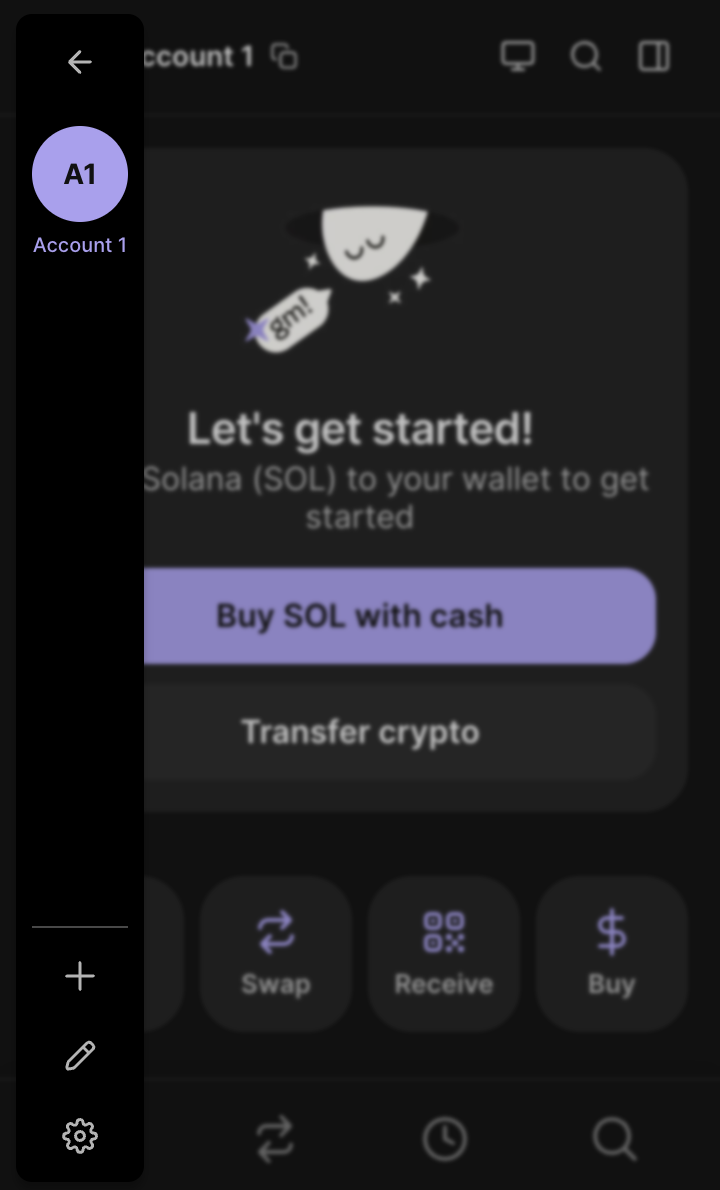
Export from Phantom
To use your Phantom wallet, you must export the private key manually.
Export steps:
- Click your account icon to open the sidebar
- Click the settings icon (gear) at the bottom of the sidebar
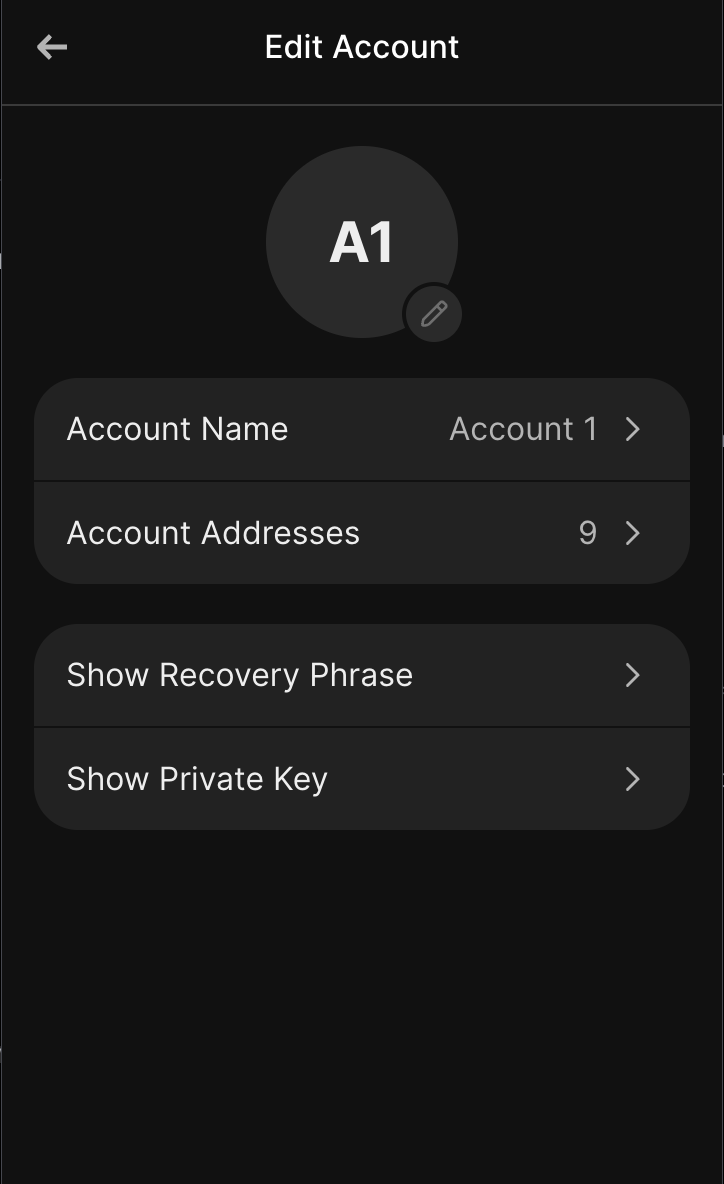
- Select your account, then choose Edit Account
- Click Show Private Key and authenticate
- Copy the base58-encoded private key string
Add the base58 string to your .env file:
SOLANA_PRIVATE_KEY=<base58-encoded-private-key>In your application, decode the key and create a signer:
import bs58 from 'bs58'import { createKeyPairSignerFromBytes } from '@solana/signers'
const keyBytes = bs58.decode(process.env.SOLANA_PRIVATE_KEY)const signer = await createKeyPairSignerFromBytes(keyBytes)Export from MetaMask
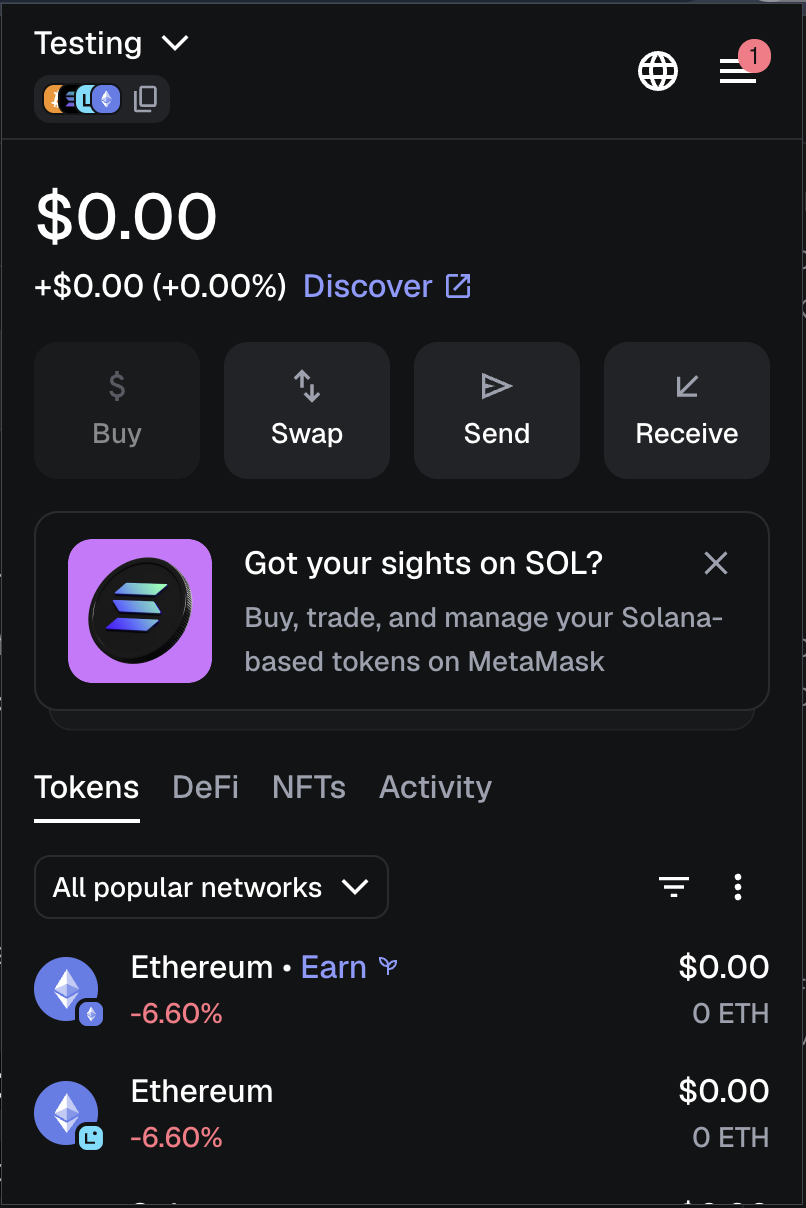
To use your MetaMask wallet, export the private key from the extension.
Export steps:
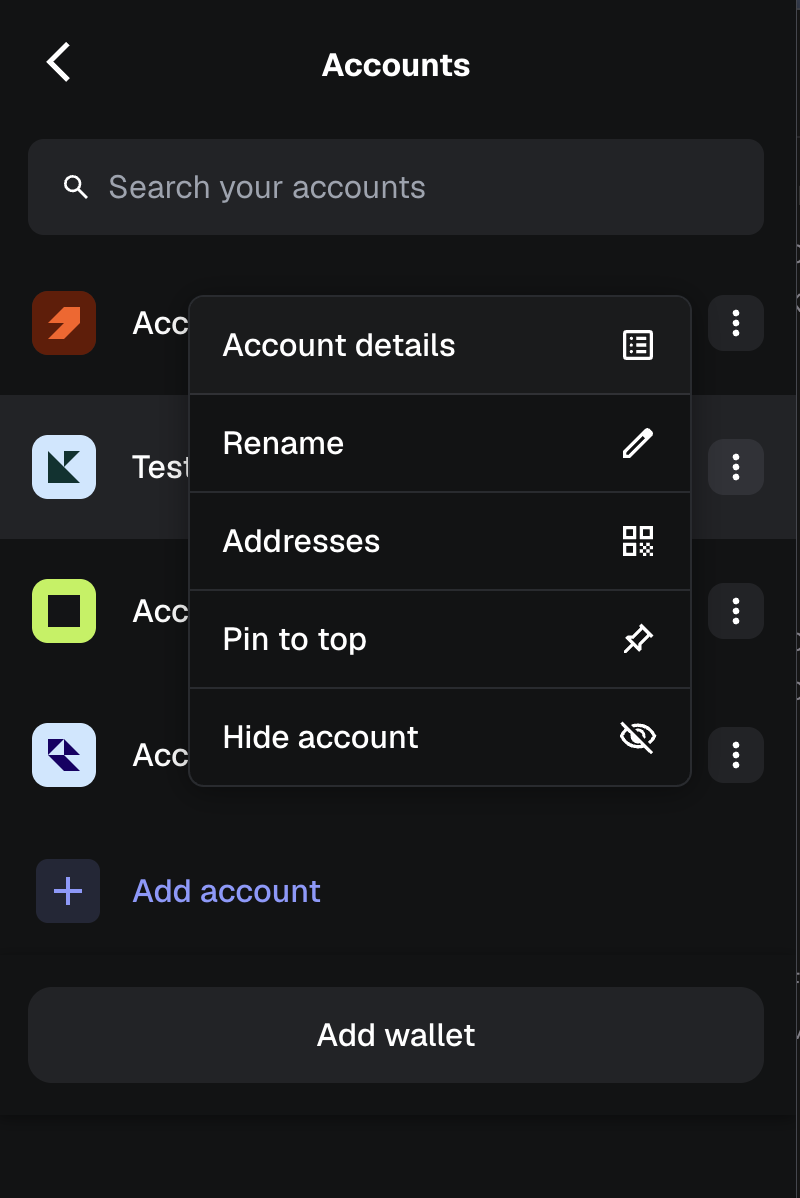
- Open MetaMask and click the menu icon (···) next to your account name
- Select Account details
- Click Show private key
- Authenticate and copy the hexadecimal private key

Add the private key to your .env file:
EVM_PRIVATE_KEY=0x...In your application, create a signer using viem:
import { privateKeyToAccount } from 'viem/accounts'
const key = process.env.EVM_PRIVATE_KEYconst signer = privateKeyToAccount(key.startsWith('0x') ? key : `0x${key}`)Install Packages
Section titled “Install Packages”npm install @canister-software/x402-icp @x402/core @x402/fetch dotenv| Package | Purpose |
|---|---|
@canister-software/x402-icp | ICP-specific signer and scheme registration |
@x402/core | Core x402 client |
@x402/fetch | Payment-aware fetch wrapper |
dotenv | Load environment variables from .env |
npm install @x402/svm @solana/signers bs58 @x402/core @x402/fetch dotenv| Package | Purpose |
|---|---|
@x402/svm | Solana signer and scheme registration |
@solana/signers | createKeyPairSignerFromBytes |
bs58 | Decode the base58 private key exported from Phantom |
@x402/core | Core x402 client |
@x402/fetch | Payment-aware fetch wrapper |
dotenv | Load environment variables from .env |
npm install @x402/evm viem @x402/core @x402/fetch dotenv| Package | Purpose |
|---|---|
@x402/evm | EVM signer and scheme registration |
viem | privateKeyToAccount and EVM account utilities |
@x402/core | Core x402 client |
@x402/fetch | Payment-aware fetch wrapper |
dotenv | Load environment variables from .env |
Configure Environment
Section titled “Configure Environment”Create a .env file in your project root:
PEM_PATH=./identity.pemRESOURCE_SERVER_URL=https://facilitator.canister.softwareENDPOINT=/api/data| Variable | Description |
|---|---|
PEM_PATH | Path to your ICP identity PEM file |
RESOURCE_SERVER_URL | The Consensus facilitator URL that routes your request |
ENDPOINT | The API route you want to call through the network |
SOLANA_PRIVATE_KEY=<base58-private-key>RESOURCE_SERVER_URL=https://facilitator.canister.softwareENDPOINT=/api/data| Variable | Description |
|---|---|
SOLANA_PRIVATE_KEY | Your base58-encoded Solana private key exported from Phantom |
RESOURCE_SERVER_URL | The Consensus facilitator URL that routes your request |
ENDPOINT | The API route you want to call through the network |
EVM_PRIVATE_KEY=0x...RESOURCE_SERVER_URL=https://facilitator.canister.softwareENDPOINT=/api/data| Variable | Description |
|---|---|
EVM_PRIVATE_KEY | Your EVM private key (hex, 0x-prefixed) exported from MetaMask |
RESOURCE_SERVER_URL | The Consensus facilitator URL that routes your request |
ENDPOINT | The API route you want to call through the network |
Building the Client
Section titled “Building the Client”Create a file client.js and add each step below.
Create the signer
Section titled “Create the signer”import dotenv from 'dotenv'dotenv.config()
import { pemToSigner } from '@canister-software/x402-icp/client'
const PEM_PATH = process.env.PEM_PATH || './identity.pem'
const signer = await pemToSigner(PEM_PATH)console.log(`Signer principal: ${signer.principal}`)pemToSigner reads your PEM file and returns a signer object. The principal logged on startup confirms the correct identity is loaded.
import dotenv from 'dotenv'dotenv.config()
import bs58 from 'bs58'import { createKeyPairSignerFromBytes } from '@solana/signers'
const keyBytes = bs58.decode(process.env.SOLANA_PRIVATE_KEY)const signer = await createKeyPairSignerFromBytes(keyBytes)console.log(`Signer address: ${signer.address}`)
Phantom exports your private key as a base58 string. bs58.decode converts it back to the raw byte array that createKeyPairSignerFromBytes expects.
import dotenv from 'dotenv'dotenv.config()
import { privateKeyToAccount } from 'viem/accounts'
const key = process.env.EVM_PRIVATE_KEYconst signer = privateKeyToAccount(key.startsWith('0x') ? key : `0x${key}`)console.log(`Signer address: ${signer.address}`)
privateKeyToAccount creates a local account from the raw hex key. The 0x prefix guard handles keys exported with or without it.
Create the x402 client and register the scheme
Section titled “Create the x402 client and register the scheme”import { x402Client } from '@x402/core/client'import { registerExactIcpScheme } from '@canister-software/x402-icp/client'
const client = new x402Client()registerExactIcpScheme(client, { signer })registerExactIcpScheme teaches the client how to respond to ICP-based payment challenges. When the server returns a 402 Payment Required, the client constructs and signs a valid ICP payment authorisation using your identity.
import { x402Client } from '@x402/core/client'import { registerExactSvmScheme } from '@x402/svm/exact/client'
const client = new x402Client()registerExactSvmScheme(client, { signer })
import { x402Client } from '@x402/core/client'import { registerExactEvmScheme } from '@x402/evm/exact/client'
const client = new x402Client()registerExactEvmScheme(client, { signer })Wrap fetch with payment
Section titled “Wrap fetch with payment”This step is identical for all networks.
import { wrapFetchWithPayment } from '@x402/fetch'
const fetchWithPayment = wrapFetchWithPayment(fetch, client)
wrapFetchWithPayment returns a drop-in replacement for the standard fetch function. Swap fetch for fetchWithPayment anywhere in your code and the x402 payment flow is handled transparently — no manual payment logic required.
Make requests
Section titled “Make requests”This step is identical for all networks.
const SERVER_URL = process.env.RESOURCE_SERVER_URL || 'https://facilitator.canister.software'const ENDPOINT = process.env.ENDPOINT || '/api/data'
const response = await fetchWithPayment(`${SERVER_URL}${ENDPOINT}`)const body = await response.json()console.log(JSON.stringify(body, null, 2))
When fetchWithPayment receives a 402 Payment Required it automatically:
- Reads the payment details from the response
- Signs the payment authorisation using your signer
- Retries the original request with the payment attached
- Returns the final response to your code
Your application sees only the successful response — the payment round-trip is invisible.
Complete Client
Section titled “Complete Client”import dotenv from 'dotenv'dotenv.config()
import { x402Client } from '@x402/core/client'import { wrapFetchWithPayment } from '@x402/fetch'import { registerExactIcpScheme, pemToSigner } from '@canister-software/x402-icp/client'
const PEM_PATH = process.env.PEM_PATH || './identity.pem'const SERVER_URL = process.env.RESOURCE_SERVER_URL || 'https://facilitator.canister.software'const ENDPOINT = process.env.ENDPOINT || '/api/data'
async function main() { // 1. Create signer from PEM const signer = await pemToSigner(PEM_PATH) console.log(`Signer principal: ${signer.principal}`)
// 2. Create x402 client and register ICP scheme const client = new x402Client() registerExactIcpScheme(client, { signer })
// 3. Wrap fetch with payment handling const fetchWithPayment = wrapFetchWithPayment(fetch, client)
// 4. Make the request — x402 handles 402 → sign → retry automatically const response = await fetchWithPayment(`${SERVER_URL}${ENDPOINT}`) const body = await response.json() console.log(JSON.stringify(body, null, 2))}
main()import dotenv from 'dotenv'dotenv.config()
import bs58 from 'bs58'import { createKeyPairSignerFromBytes } from '@solana/signers'import { x402Client } from '@x402/core/client'import { wrapFetchWithPayment } from '@x402/fetch'import { registerExactSvmScheme } from '@x402/svm/exact/client'
const SERVER_URL = process.env.RESOURCE_SERVER_URL || 'https://facilitator.canister.software'const ENDPOINT = process.env.ENDPOINT || '/api/data'
async function main() { // 1. Decode base58 key exported from Phantom and create signer const keyBytes = bs58.decode(process.env.SOLANA_PRIVATE_KEY) const signer = await createKeyPairSignerFromBytes(keyBytes) console.log(`Signer address: ${signer.address}`)
// 2. Create x402 client and register SVM scheme const client = new x402Client() registerExactSvmScheme(client, { signer })
// 3. Wrap fetch with payment handling const fetchWithPayment = wrapFetchWithPayment(fetch, client)
// 4. Make the request — x402 handles 402 → sign → retry automatically const response = await fetchWithPayment(`${SERVER_URL}${ENDPOINT}`) const body = await response.json() console.log(JSON.stringify(body, null, 2))}
main()import dotenv from 'dotenv'dotenv.config()
import { privateKeyToAccount } from 'viem/accounts'import { x402Client } from '@x402/core/client'import { wrapFetchWithPayment } from '@x402/fetch'import { registerExactEvmScheme } from '@x402/evm/exact/client'
const SERVER_URL = process.env.RESOURCE_SERVER_URL || 'https://facilitator.canister.software'const ENDPOINT = process.env.ENDPOINT || '/api/data'
async function main() { // 1. Create signer from private key const key = process.env.EVM_PRIVATE_KEY const signer = privateKeyToAccount(key.startsWith('0x') ? key : `0x${key}`) console.log(`Signer address: ${signer.address}`)
// 2. Create x402 client and register EVM scheme const client = new x402Client() registerExactEvmScheme(client, { signer })
// 3. Wrap fetch with payment handling const fetchWithPayment = wrapFetchWithPayment(fetch, client)
// 4. Make the request — x402 handles 402 → sign → retry automatically const response = await fetchWithPayment(`${SERVER_URL}${ENDPOINT}`) const body = await response.json() console.log(JSON.stringify(body, null, 2))}
main()Run It
Section titled “Run It”node client.jsSigner principal: xxxxx-xxxxx-xxxxx-xxxxx-cai{ // response from the endpoint}Signer address: <base58-public-key>{ // response from the endpoint}Signer address: 0x...{ // response from the endpoint}Next Steps
Section titled “Next Steps”- Installing a Consensus Node — run your own node in the network
- Consensus API — full reference for all available routes
- Routing a Request — a deeper walkthrough of the full request lifecycle